
Connect with us
Youtube to MP3 – Made Simple In this article, we are summarizing the best methods to download music from Youtube to MP3. Anyway you slice it,...
The Best Linus Tech Tip Memes So Far Linus Gabriel Sebastian is the founder of Linus Media Group, and a famous YouTube personality, presenter, and producer....
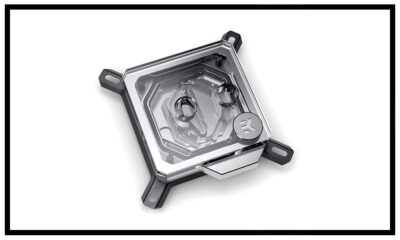

Introduction Its been about six years since EK launched their very successful lineup of Supremacy water blocks. However, as processors evolve to include more cores and...
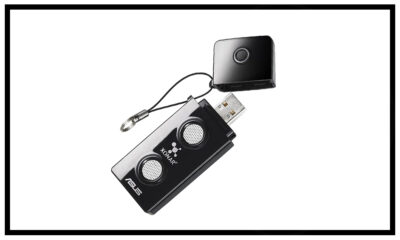

If you've decided it is due time to finally time to do away with the onboard audio on your mobile computer, wanting something that makes your...


But if you are not likely to even pass out your hard earned loot for the 300R, 400R or 500R, then what about $60 for a...


Be quiet! is a German company that mainly produces power supplies, PC cases, and PC Coolers. be quiet! has just released its latest PSU titled the...


Introduction Unless you’ve been living under a pretty large rock the last few years, you’ve probably noticed that literally, everything in the PC world has gone...
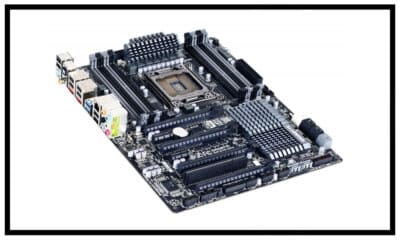

And this is just what has happened, Gigabyte has update the technology and name its obviously Ultra Durable 5. Currently, it is offered on four motherboards:...
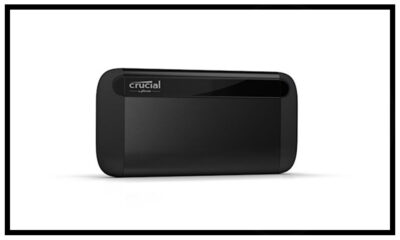

Introduction One of the biggest issues with data is the constantly growing amount of it we need, and the need to have it with us....
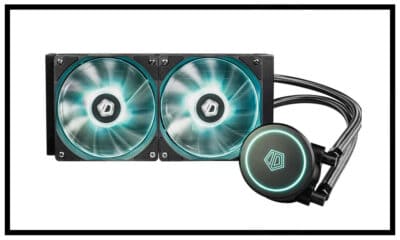

Introduction With the ever-increasing clock speeds and core counts of today’s processors, you’re often looking for a better cooling solution to get the most out...


What are the best anime cats? Cats are something you either love with every fiber of your being or vehemently...


Who are the best anime teachers? With high school being such a prevalent setting in anime, it makes sense that...


Who are the best orange hair anime girls? Orange hair is interesting in anime because it can either be a...


Who are the best anime doctors? Anime has many different types of medical professionals, from actual doctors to magical healers and...


Who are the best anime goth girls? No matter where they are, goth girls steal the show immediately with their...